
Saturday, July 24, 2010
July Nearmap Photo
Thanks to Janine Kimberley for the update to Nearmap. I got to see the latest. This was taken on the day that they were doing the stumps.

Wednesday, July 21, 2010
Plumbing and Heating Going In
Her indoors did a midday drive by and this is what she saw:

Got to love the iphone updates in the middle of the day.

Got to love the iphone updates in the middle of the day.
Lintel Up
One of the Lintel's magically jumped up onto the brickwork yesterday and the scaffolding has disappeared.


Tuesday, July 20, 2010
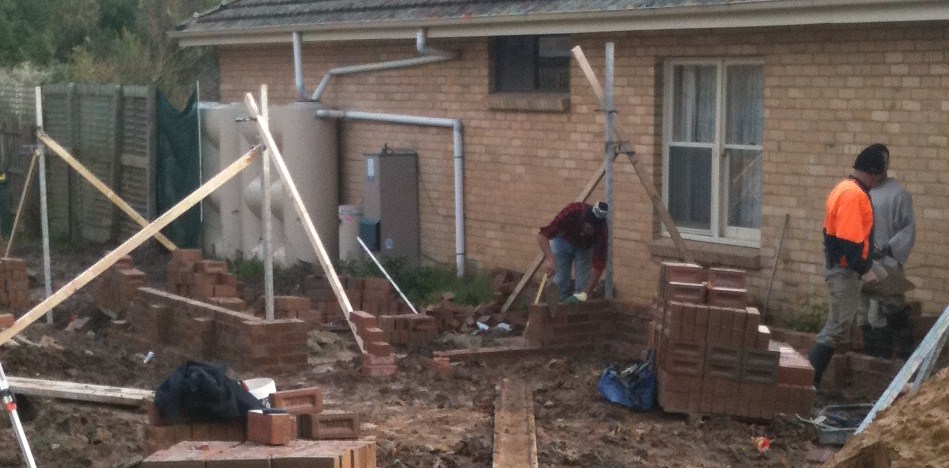
Cabinets and Electrics
Wow, what a day. We are getting close to needing to finalise everything so we thought that we would combine our final cabinet maker appointment and our electrical appointment into one day and get them over with. We started early so I could get to work in the afternoon.....
Cabinets appointment went well. We managed to convince the guy that we could get the bin to work mounted high under our bench, which is something that we have really wanted. Now we will have two 17L bins in a pull out drawer with a drawer, hopefully 286mm deep beneath the bin drawer. We will have garbage in the front drawer bin and compost in the back drawer bin and we will put a liner in the lower drawer for recycling.
We had to change our kitchen cabinet colours because the alabaster in the vinyl wrap that the cabinet maker used was a lot darker than the sample that we were going from. So our kitchen and laundry cabinets are now parchment (looks exactly like alabaster).
Then we had to go from Pakenham for cabinets to Tullamarine for Electrical. This is a very long way. When we arrived they didn't seem terribly ready for us, apparently they thought we were coming next week. Given I'd organised a morning off work and we had to get relos to look after the kids and we had just driven a huge distance we didn't really want to have to come back some other time.
Luckily they found someone else to go through the plans with us. Just like the estimate for electricals that we received from our Premier Salesperson the estimate for the time was discounted by 70%. We received a letter that said to allow for 1 to 1.5 hours and even excluding the extra hour we had to wait for the replacement electrician it still took over 3 hours to go through our plans.
So over $4,000 in electricals we now have a reasonable comfortable house with switches, lights, tv points and other minor modifications. I would hate to see what it would cost to get a good home automation system.
Now that I know where all of the light switches are I will have to try to draw them in 3D (I'm not too good with curves yet though).
Monday, July 19, 2010
Weekend Site Explore
I thought that I would write a little about what else I saw on Sunday other than the timber spacing.
I took a photo of the delivery slip for the steel.
 It looks like they had too many 2400 long sections and not enough 3000 but we'll see how things go.
Most of the timber looks good. Except I found a knot right near the edge.

 This knot is right at the back of her indoor's walk in robe so unless she goes all Imelda Marcos with heavy shoes I think we will be OK.
I also found all of these holes dug for our alfresco. I assume that this will be for the posts for our timber alfresco.

I took a photo of the delivery slip for the steel.

Most of the timber looks good. Except I found a knot right near the edge.


I also found all of these holes dug for our alfresco. I assume that this will be for the posts for our timber alfresco.

Sunday, July 18, 2010
Drawing Up Kitchen
I'm in the process of trying to get a better representation of the kitchen. I thought that I would note down how I went as a bit of a guide to other that may be interested in drawing their house or kitchen. Feel free to pop by to my new blog "Blending a 3D kitchen." This is where I am up to:
 It certainly isn't much at the moment. It is really just the walls around the kitchen, however I will try to progress this further.

Saturday, July 17, 2010
Review of Timber Strengths
I had a wander around the site today and checked out the types of timber used and the general spans etc.
It looks like a combination of MGP12 and MGP10 were used. Also spans went from 1400 to 1650 for the bearers and the joists were typically spanning similar lengths with spacing of 450 consistent across everywhere. The bearers were 2/95x35 sections and the joists were 95x45.
Unfortunately I could only access the code for F7 grade timber which has the following properties compared to MGP10
E = 7900 cf 10000
f'b = 18 cf 17


As deflection often governs span lengths in timber framed construction it is really only the ratio of the E values that matters. Therefore I can just adjust the allowances for the F7 up to MGP10 based on the ratio of E values.
AS1684.2N1N2 F7 Supplement allows 1400mm spans for single spans and 1700 continuous spans for 450mm spaced joists supporting load bearing walls. This was consistent with what was on site.
 Similarly the bearers seemed to spaced adequately given a bit of an increase from what can be seen in the table below. So all looks good.

It's funny using such prescriptive codes compared to what I normally use but everything is looking good.
It looks like a combination of MGP12 and MGP10 were used. Also spans went from 1400 to 1650 for the bearers and the joists were typically spanning similar lengths with spacing of 450 consistent across everywhere. The bearers were 2/95x35 sections and the joists were 95x45.
Unfortunately I could only access the code for F7 grade timber which has the following properties compared to MGP10
E = 7900 cf 10000
f'b = 18 cf 17


As deflection often governs span lengths in timber framed construction it is really only the ratio of the E values that matters. Therefore I can just adjust the allowances for the F7 up to MGP10 based on the ratio of E values.
AS1684.2N1N2 F7 Supplement allows 1400mm spans for single spans and 1700 continuous spans for 450mm spaced joists supporting load bearing walls. This was consistent with what was on site.


It's funny using such prescriptive codes compared to what I normally use but everything is looking good.
Friday, July 16, 2010
Another Nearmap Update
There is a new update for nearmap. It is dated 21 June 2010.
 You can see all of the pallets of bricks and the brickies sand.

Thursday, July 15, 2010

Tuesday, July 13, 2010
Stumps, Bearers and Joists
Things are progressing really well now.
The brickies finished up most of their work on Monday morning whilst at the same time holes for the stumps were being augured.
 The timber and stumps were also delivered
 We went by last night and measured things up. All of the spacing of the stumps seemed to be in accordance with AS1684.2.
This morning by about 10:00AM almost all of the joists were in place on top of the bearers.


The brickies finished up most of their work on Monday morning whilst at the same time holes for the stumps were being augured.


This morning by about 10:00AM almost all of the joists were in place on top of the bearers.

This is the view through the garage. I wonder what they will use for the wall between the house floor and the garage slab?
The view below shows the finished floor. Not the different section on the left. I think that this is the shower recess.

Saturday, July 10, 2010
Friday's Progress
Here are some more photos of our progress through the week.

 This is the gap that they needed to make for the sub floor access.
 This is what we found on Saturday morning. I did some measuring to check and all seems OK.
I've also gone back in the blog and added some tips and I've detailed our selections. I will also try to add a link to these on one of the items to the side.
I will post another update tomorrow on our colour selections that we finalised this morning.
We also got details of our electricals in the mail and we need to plan these now.


The above was on Friday morning

I've also gone back in the blog and added some tips and I've detailed our selections. I will also try to add a link to these on one of the items to the side.
I will post another update tomorrow on our colour selections that we finalised this morning.
We also got details of our electricals in the mail and we need to plan these now.
Friday, July 9, 2010
Bricks almost done (to floor)
Sorry I haven't posted much this week but it's been a great week for progress.


This is our alfresco. This will be about as high as it will be off the ground.
 This is where our sewerage will leave the building (hopefully they haven't put any holes in this pipe like they did with the down pipes).
 This is the view into our rumpus room. It was this photo that her indoors took that made me think that something was missing. Compare this photo (wall on left is back elevation) to the following elevation drawing.
 I couldn't see any sub-floor access. I also could not see any sub-floor vents. So Tuesday night another email to our Construction Manager. Next morning though, her indoors went past early and apparently they had forgotten about it and will sort it out. Also the vents go in the next course up.

Tuesday's Progress

Garage Expansion Joint gets taller (strangely there were no other expansion joints like this?)
This is what the raking should look like.

This is our alfresco. This will be about as high as it will be off the ground.


Sunday, July 4, 2010
More Bricking Photos
I bought myself a pair of gum boots and traipsed around the house today. Here are some photos of bricks so far.
 This is looking from the rumpus room, across the alfresco towards the front of the house.
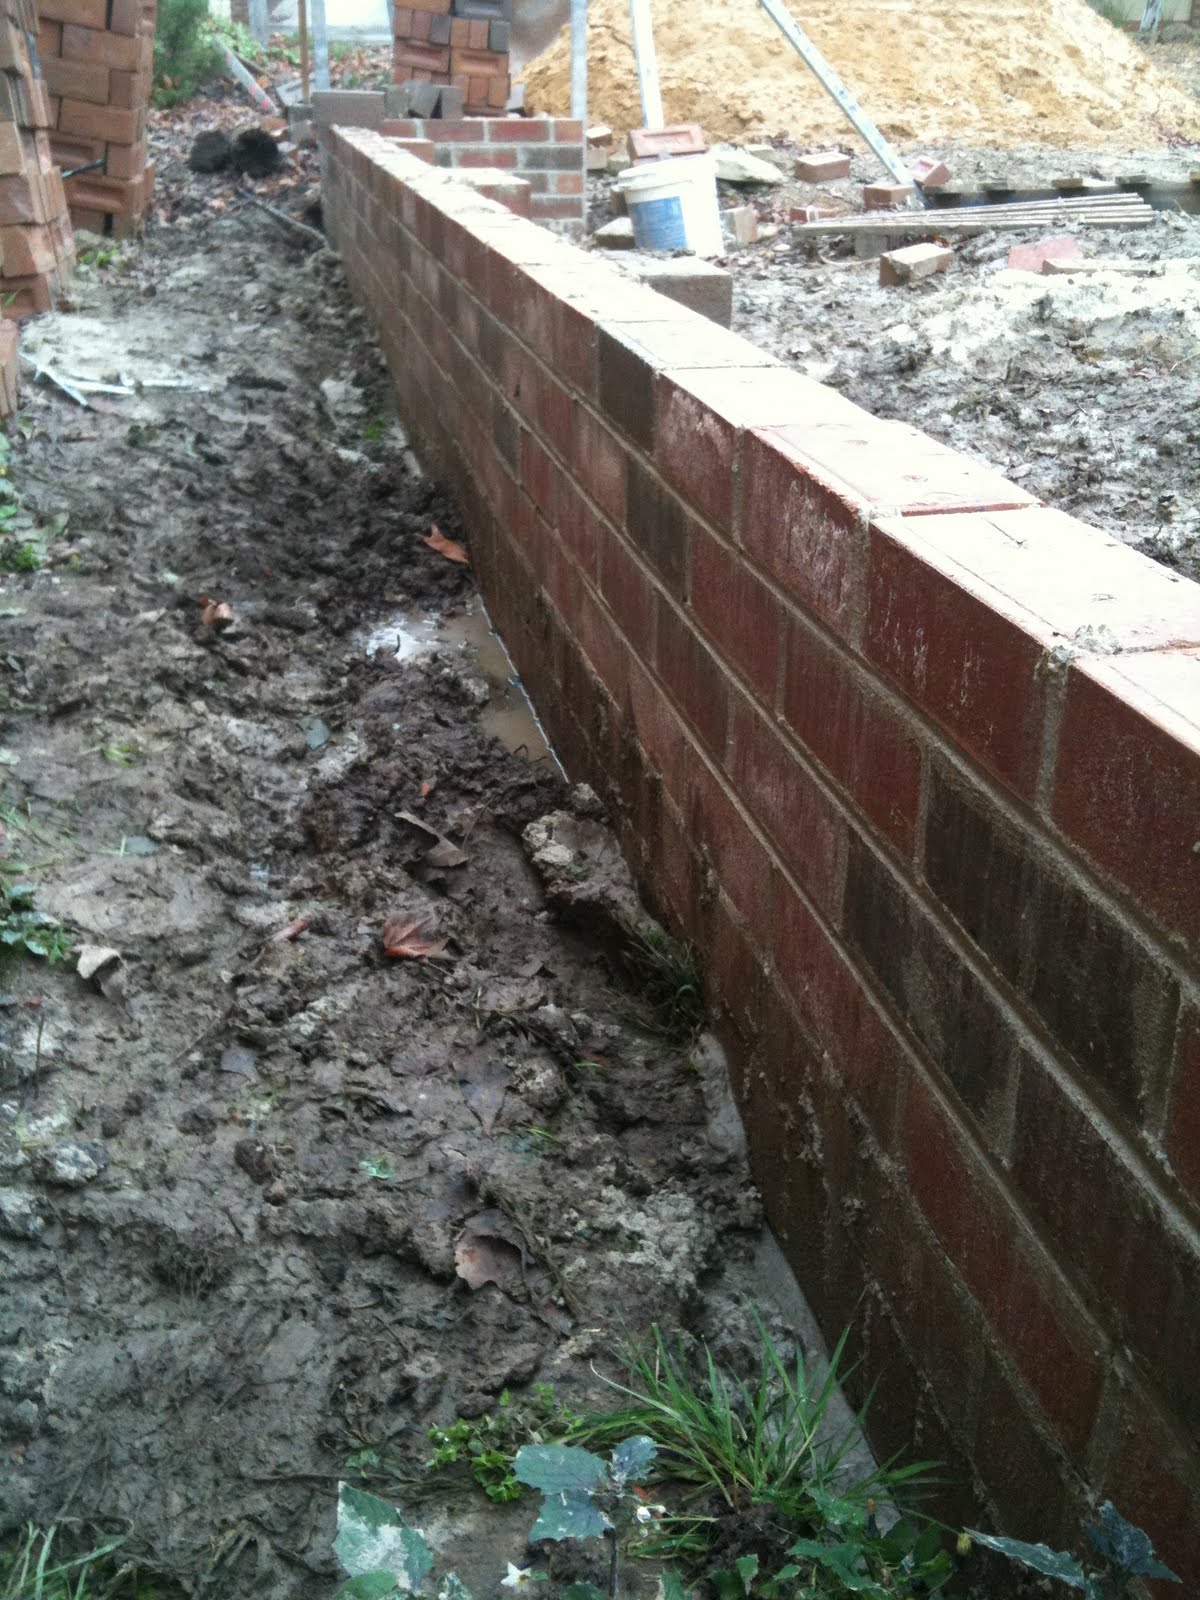
 Side of the garage. They have used the wrong mortar finish, this looks like ironed rather than the raked that we specified, see the image below. I sent an email to Romeo today and I will follow up with a phone call.

 This is about where our kitchen window will go.
 This is looking along the side of our garage. They look reasonably straight.
 This is where our garage door will go. I'm not sure why there is a footing here and why there is a step in the footing, given that there will be a slab in there and eventually a driveway.
 I think I would have been standing in our pantry taking this photo. Notice how they haven't engaged these piers yet.
 Bit of a wonky brick here.
 The brickies cut holes in our down pipes to drain the footings. I hope that these holes can be fixed. I've taken photos of them all so that I can ensure that they can get repaired.


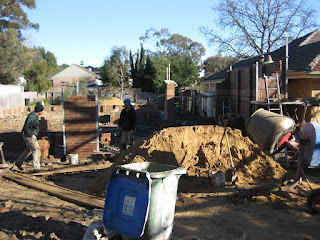
Friday, July 2, 2010
Friday Week Then - We have brickies and colours
We had a colour consultant around this morning and we are getting closer on splashback, tiles, and we now even seem to be getting close to paint colours.
Our ceiling, our cornices, the wall above the picture rail and the picture rail are likely to be fair bianca. This will also be used on all of timbers and in our wet areas.
 For below the picture rail and in the bedrooms we will use grand piano

We've still got a little bit of work to do on tiles, splashback etc, however we are on our way.
So after the colour consultancy her indoors dropped me off at the station so that I could still pop my head into the office. I thought that maybe a trip past the block might be worthwhile and oh boy was it. After weeks of its too wet and boggy and its raining we saw this:


Our ceiling, our cornices, the wall above the picture rail and the picture rail are likely to be fair bianca. This will also be used on all of timbers and in our wet areas.


We've still got a little bit of work to do on tiles, splashback etc, however we are on our way.
So after the colour consultancy her indoors dropped me off at the station so that I could still pop my head into the office. I thought that maybe a trip past the block might be worthwhile and oh boy was it. After weeks of its too wet and boggy and its raining we saw this:

Subscribe to:
Posts (Atom)